Waveform views are the central focus of navigating and analyzing the huge amount of captured data. In a waveform view you can Zoom quickly to different resolutions, snap to edges or beginning of packets, drop markers, take measurements and more.
Waveform View Details
Waveform Overview
The main application window has two Waveform Views permanently placed in the center. Additional Waveform Windows can be added and docked or positioned independently on any monitor (multiple monitors are supported). The Primary and Secondary waveform views are shown below.
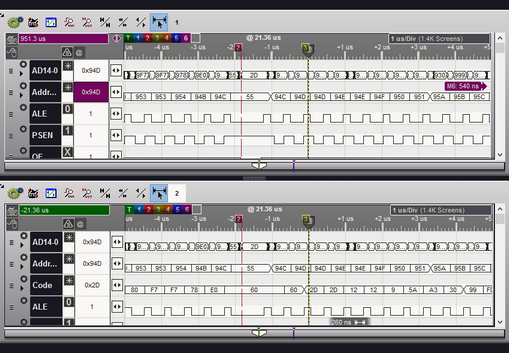
The Center Time Bookmark (center time reference) is considered "Center" because all operations center around this point and the 'Center time' displayed at the top of the Time Division area refers to its position. In the top Graphic above the Center Time is 21.36us and the bookmark is seen directly beneath it. Although it designates the center of operations, the bookmark can be moved left or right of center to suit your preference. The '@' reference point can be repositioned by moving the mouse over it until the special cursor appears, then click and drag it.

To open an additional Waveform View, use the Open Feature Window button (highlighted above) and select "Waveform View" from the menu. Unlike the primary and secondary Waveform Views, these additional Waveform Views can be docked, tabbed with other dockable windows or placed on any monitor (see Window Arrangement).
Waveform View Function Summary
▪View multiple signals in time correlation.
▪Expand Multi-Channel Signals to see individual channel waveforms by using the " + " symbol to the left of the signal name.
▪Individually reverse Expand Order of Multi-channel signals by menu.
▪Collapse expanded Multi-Channel Signals by using the " - " symbol to the left of the signal name.
▪Zoom in or out for more or less resolution.
▪Single button Zoom Max resolution or Zoom Min resolution.
▪Marque to Zoom function.
▪Scroll by a single division or Page multiple divisions.
▪Free Scroll vertically and horizontally by a Right-Click Drag.
▪Change the Trigger Mode by a Click above the Trigger Column. (see Triggers)
▪Configure Simple Triggers by a Click on the Trigger Condition symbol beside each signal's name. (see Simple Trigger)
▪See Instant Time measurement between signal changes. (see Instant Measurements)
▪Take Quick Measurements by Clicking the Middle Mouse Button and moving the mouse. (see Quick Measurements, Dynamic Measurements )
▪Link both Waveform Views at the center time for Synchronous Scrolling regardless of each view's zoom level. (see: Using Link Groups)
▪Drop Marker arbitrarily by Ctl-Drag or Drag & drop in the topmost row.
▪Snap Markers to next or previous transition of a signal by Drag & drop. (see Using Markers)
▪Snap Markers to next or previous transition and Bring to Center by Shift-Drag.
▪Snap Signal to the next or previous transition by using the " <, > " indicators to the left of the signal.
▪Arbitrary Snap to center and Edge Snap to center by a Left-Click anywhere on a signal.
▪Set, Clear or Jump to markers.
▪Signal Row Order can be re-arranged by dragging.
▪Signal Format can be set to ASCII, Binary, Decimal, HEX or Octal.
▪Independently select which signals to view in each Waveform View.
▪Edit Signal Properties by menu or Left-Click on the signal's name. (see: Signal Editors)
▪Print current Waveform View or Save as JPEG. (see: Printing)
Waveform Menus

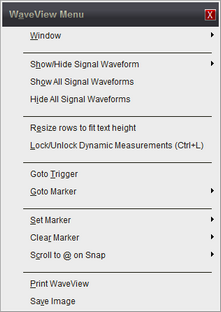
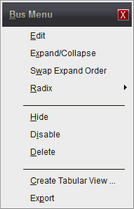
| To access the main waveform menu, click its menu button (highlighted above). To access a Signal's menu, Right-Click on a Signal name or click on its menu button. Examples of these menus are displayed below. |
Waveform Menu: |
Waveform Signal Menu: |
|
|