At the end of each waveform are two additional columns: The Snap Signal column and the Value/Marker Snap column.
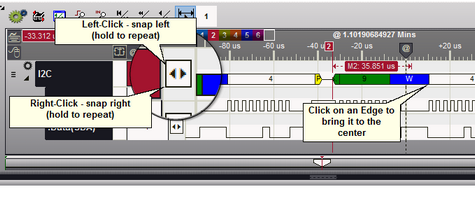
Scroll the next or previous change of a signal to the center of the screen by using the button in the Snap Signal column at the end of the waveform. Use the Left mouse button (Left-Click) to snap the previous transition into view. Use the right mouse button (Right-Click) to snap the next transition into view. The transition will scroll to the Time Reference point in the center of the screen (labeled '@' and visible to the right of the red marker below).
The Snap Signal column is the first column to the right of the waveform:
Signal Value and Marker Snap Column
The Value/Marker Snap column has multiple functions and a local menu for configuration options. It is the last column in the Waveform view, just after the Signal Snap column.
Column features:
1.Displays the value of each signal at the selected Time Reference (Time Source).
2.Displays which waveform is currently assigned to the selected marker (Active Marker) by using the marker's colors.
3.Is used to assign a different waveform to the Active Marker without changing the marker's position.
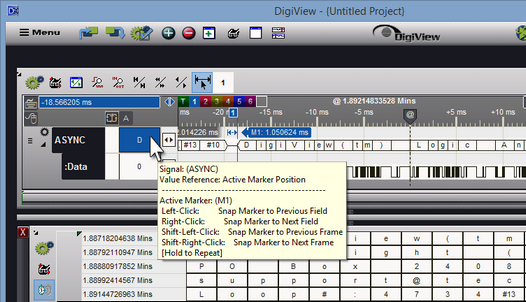
4.Is used to snap the Active Marker to the Next or Previous edge of the assigned waveform.
5.Indicates the position of the currently selected marker (Active Marker) relative to the screen's Center Time reference (marked by the movable '@' tag). This Delta measurement is displayed at the very top of the column using the same colors as the selected marker.
6.Indicates the Time Source selection (for the column's waveform values) on the Time Source button.
Example of assigning a marker to another signal without moving the marker's position:
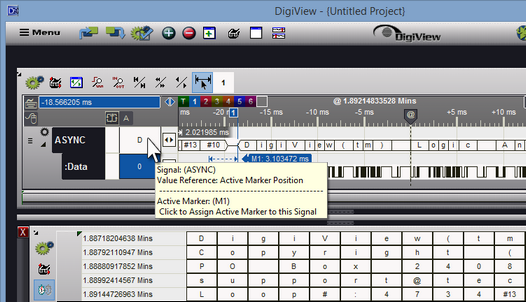
Click once in the column to re-assign the marker to another waveform. Once assigned, any Left or Right click will move the marker to the previous or next edge of the waveform. Holding either mouse button down will repeat the function. If the marker's "scroll to @" function has been enabled, the waveform's new marker position will scroll to the Center Time reference point ( also see: Using Markers: Marker Quick Menu ).
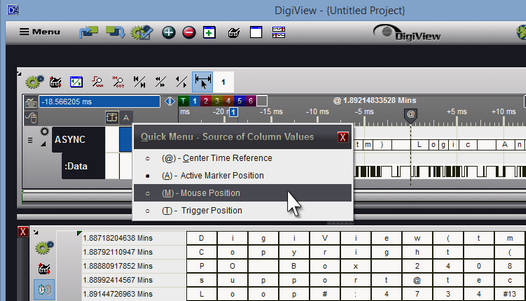
Time Reference Selections:
1.(@) - Center Time (the '@' indicator, live value update when jumping, snapping or scrolling).
2.(A) - Active Marker Position (live value update with marker movement).
3.(M) - Mouse Position (live value update with mouse movement).
4.(T) - Trigger Position (static, values of each waveform at time 0).
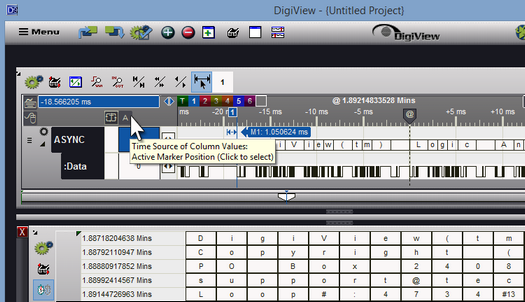
Click the Time Source button at the top of the value column (above the waveforms) to change the Time Reference for the displayed values. This button also serves as an indicator to remind you of the current setting.
In the images above, this button displays the letter "A", indicating the values displayed for each waveform are from the time corresponding to the Active Marker's position. In the images below, the button indicates a selection of "Center Time", which is the time corresponding to the screen's time reference (marked by the movable '@' tag).
Click on the Time Source button to open the selection menu and change the setting: