Creating a Template
Templates are a convenient starting point for your project. When creating a project you can select from several built-in templates or any custom template created from any of your projects. Once you learn the advanced features of our DigiView software, you may have your own starting point preferences and can use those as a starting template.
To create a template, open any project and select:
Menu->Project->Save As Template ... and the following Template Editor will appear.
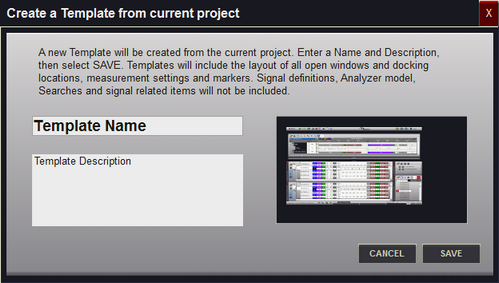
Template Name
Enter a short name that will reflects the main feature of this template.
Template Description
Enter descriptive text that will help you remember the main differences in this template.
Thumbnail Image
This is the image that will display in the Template Selection window. It is created automatically from the current project.
Note 1: Although the image does not completely reflect the project's position relative to all monitors attached to the system, templates retain monitor specific information.
Note 2: Templates do not include Analyzer model, Signal definitions or anything that relies on signal specific information (i.e. search definitions). If these items are needed, then use the Clone Project feature instead.
Managing Templates
You may want to go back and remove some of the custom templates you have created. To do this select:
Menu->Project->Manage Templates ... and the Template Manager will appear.
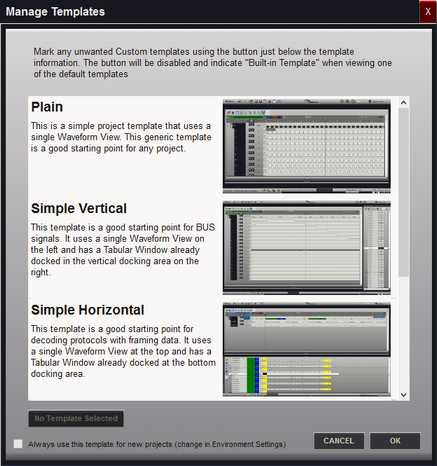
Notice the button in the lower left corner. This button's caption will change for different actions.
This is the Action Button.

The Action button is disabled and indicates "No Template Selected" if you have not selected a template. Selecting OK without selecting a template will close the window without making any changes (same as using Cancel).

When a Built-in template is selected, the action button is disabled. Built-in templates can not be deleted.

Clicking the Action Button after selecting a custom template will mark that template for deletion. You can select and mark as many custom templates as you want. Each template that is marked for deletion will have a large red X over it, indicating this template will be selected when you select the OK button. A marked template is shown below.
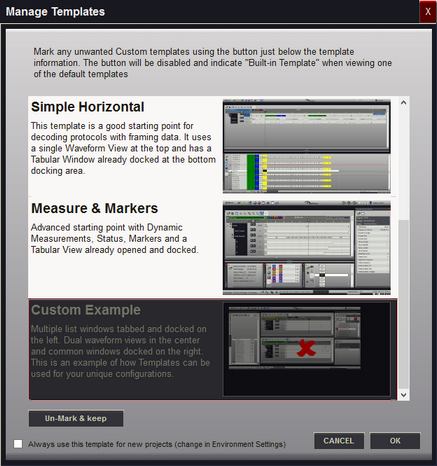

The action button changes to "un-Mark & Keep" when you select a marked template. Click the action button to un-mark the template if you decide to keep it instead of deleting it.
Selecting a Default Template

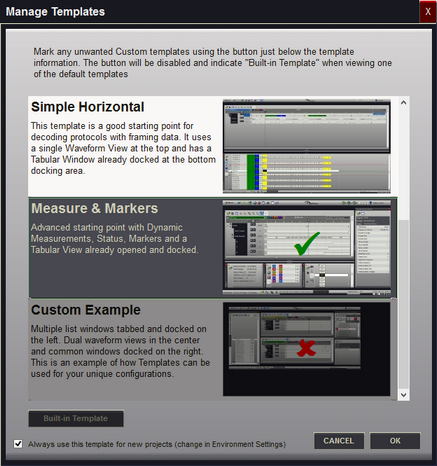
To skip the Template selection window when creating new projects, select the "Always use" option in the lower left corner and select a template. Any template not marked for deletion can be selected as the default template. The selected default template will have a large green check mark over it, indicating it will be used as the default for any new projects after you Click the OK button. An example of the default indicator is displayed below.
To disable the default and have the selection window appear when a new project is created, open the manager again, select the template (marked with a green check mark) and then un-check the "Always use" option. You can also accomplish this by enabling the "Select From Templates" environment option.
Acquisition settings are always stored in the template but are ignored unless you choose to use them by selecting the Environment option "Use Template Acquisition settings". (see Environment Settings, Acquisition Options) .