You may wish to open a Project configured for a different Analyzer model than the one currently attached to your PC and use it with the new analyzer without having to recreate the project and all its settings. To do this, you can can clone the project by selecting
Menu-> Project->Clone Settings...
Note: Cloning will create a new project that retains all the settings of the current project. Cloning does not include the embedded data or Capture History.
After selecting Clone Settings, the Analyzer selection window will open.
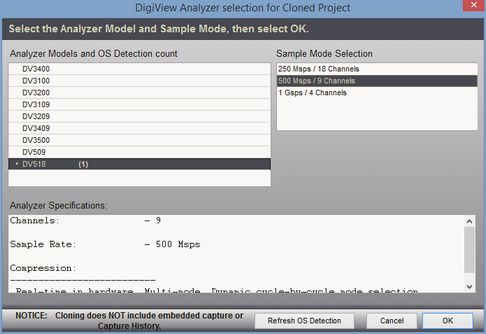
Analyzer Models and OS Detection Count
This area lists all models of DigiView that are compatible with this version of Software. The software automatically selects the attached device when this window first opens. Next to each model's name is the enumerated count as detected by the Operating System (OS). The count will refresh automatically if the number of attached devices changes while this dialog is open.
Note: Hardware does not have to be present. You can clone the project for any model and mode.
Sample Mode
This area will change to the offer any modes available to the analyzer model selected on the left. As you choose a mode, its details will display
in the Analyzer Specifications area.
Refresh OS Detection
If you do not see a detection count next to the model of an attached device, try pressing the Refresh OS Detection button. If the count is still missing, then the Operating System is having difficulty identifying the analyzer and has not enumerated it on the USB bus. You may need to use a different USB port or verify that you are using a high bandwidth USB cable or the one supplied with the analyzer. If the unit is not detected properly when connected to a USB 2.0 port you may need an externally powered hub.
Cancel
You can still choose to stop the cloning at this point by pressing the Cancel button. The window will close and no action will be taken to clone the project.
OK
Proceed with the cloning as configured.
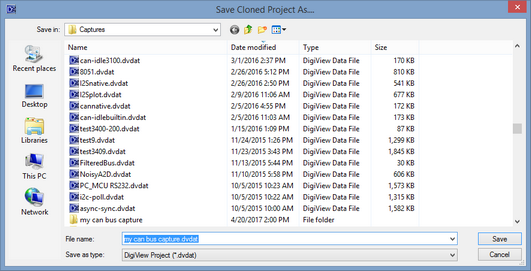
Select a new name for the cloned project
After selecting OK above, you will be prompted for a new name and location for the project before it is created and opened. Selecting Cancel will terminate the cloning, canceling the operation.
NOTE: If you clone a project to an Analyzer or mode that has fewer channels than its Signal Definitions are configured to use or the definitions use a higher channel number than available, many configuration items will be incomplete or invalid. The software will disable invalid Signal definitions, Search definitions and all other uses of an invalid Signal definition. Visual indicators will be present after the cloning if any item has been disabled.